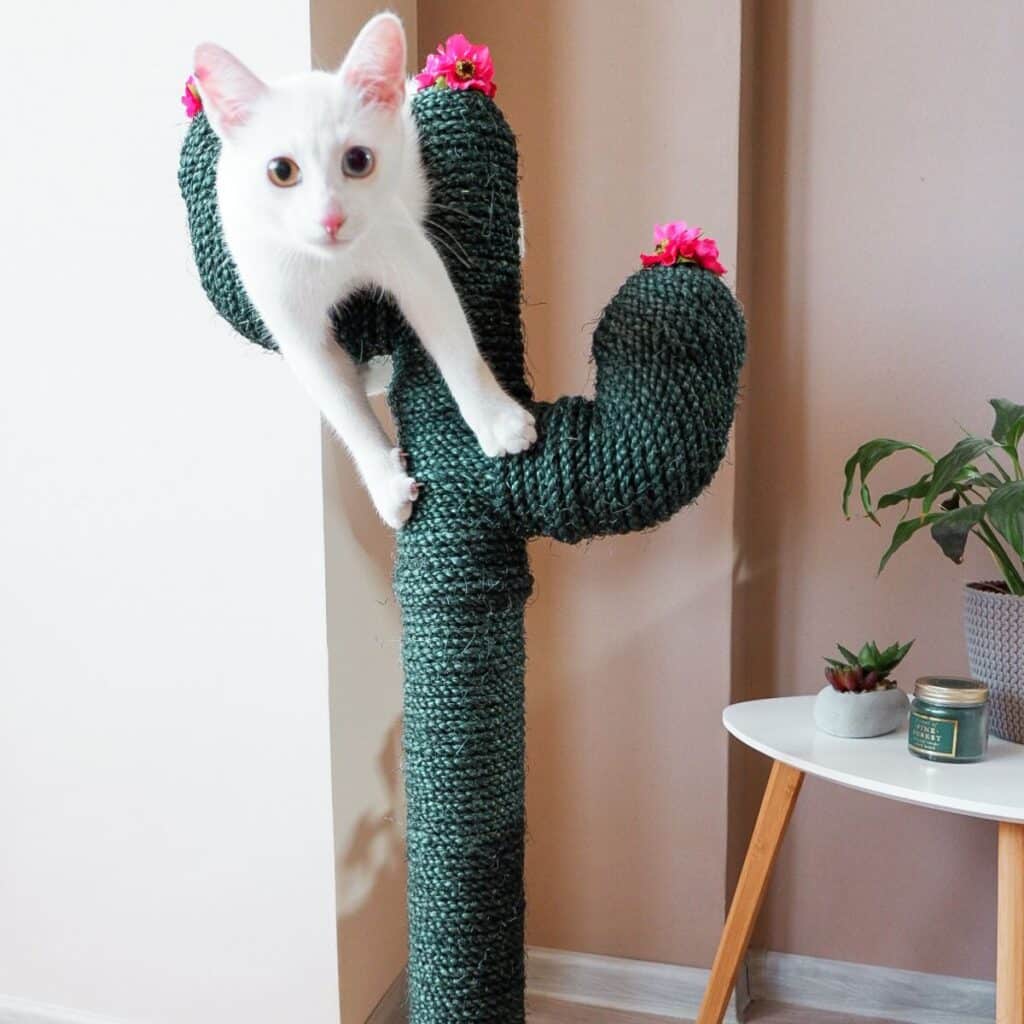
DIY Cactus Cat Scratcher for International Cat Day
 Download Article
This blog will show you how to make a DIY cactus cat scratcher. Just follow the step- by-step instructions below and learn more about how you can spoil your favourite one with this scratcher on International Cat Day.
Step by Step Instructions
- Experience Required: Medium
- Tools Required: Electric Drill, Glue Gun
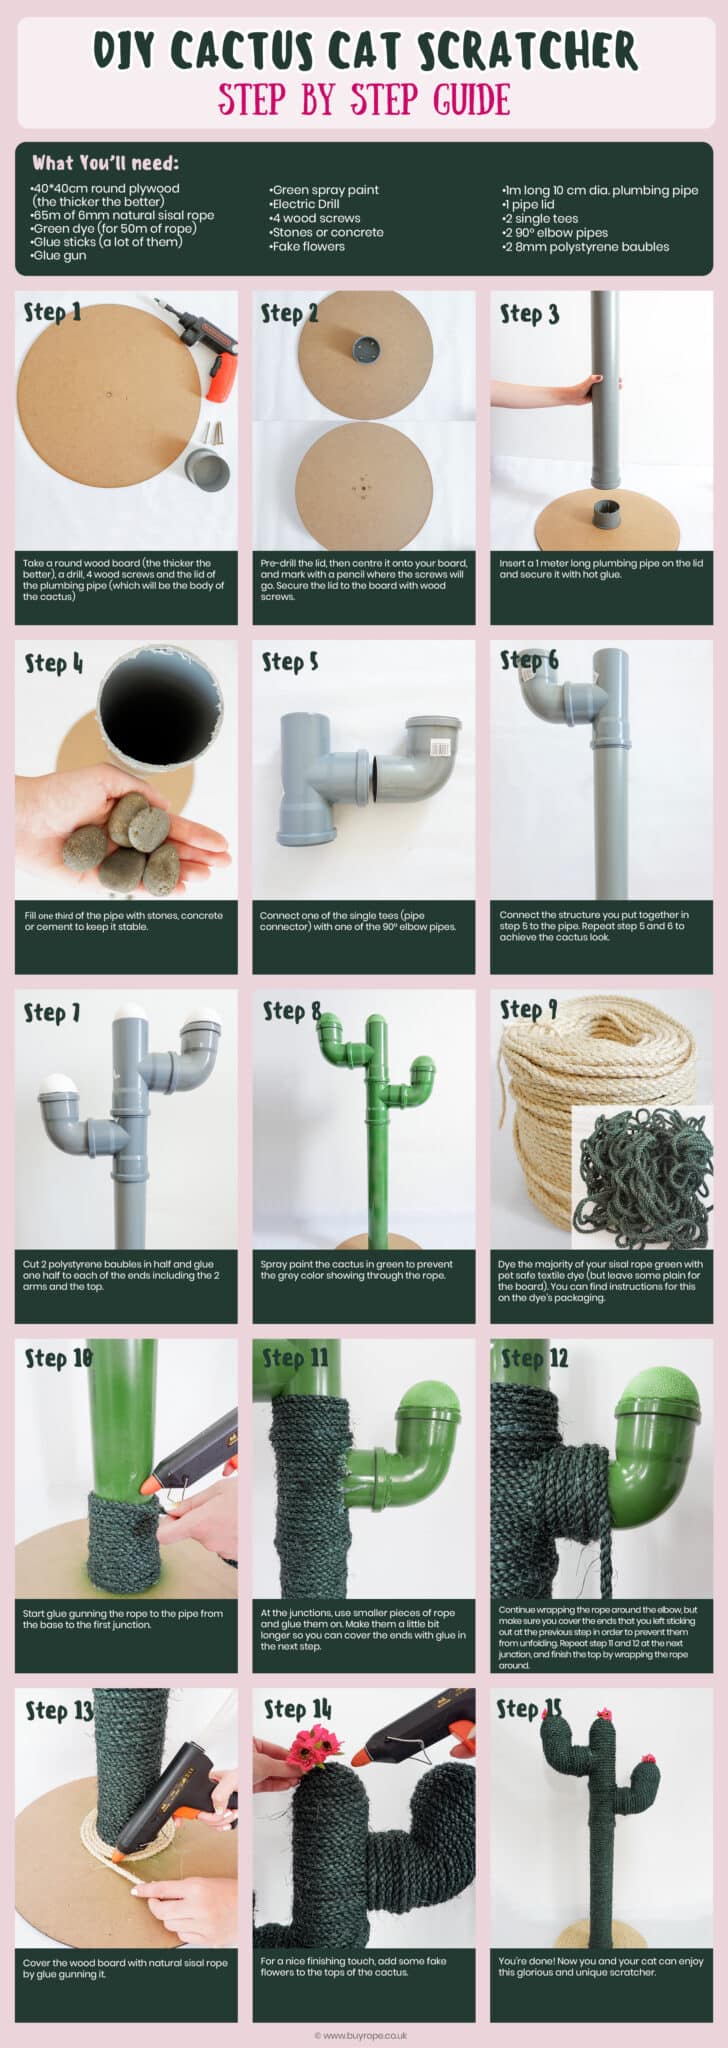
- Materials Required: 6mm Natural sisal rope, Green dye, Round plywood, Glue sticks, Green spray paint, Wood screws, Stones or concrete, Artificial flowers, Plumbing pipe, Pipe lid, Single tees, Elbow pipes, Polystyrene baubles
STEP 1) Preparing Your Tools and Materials
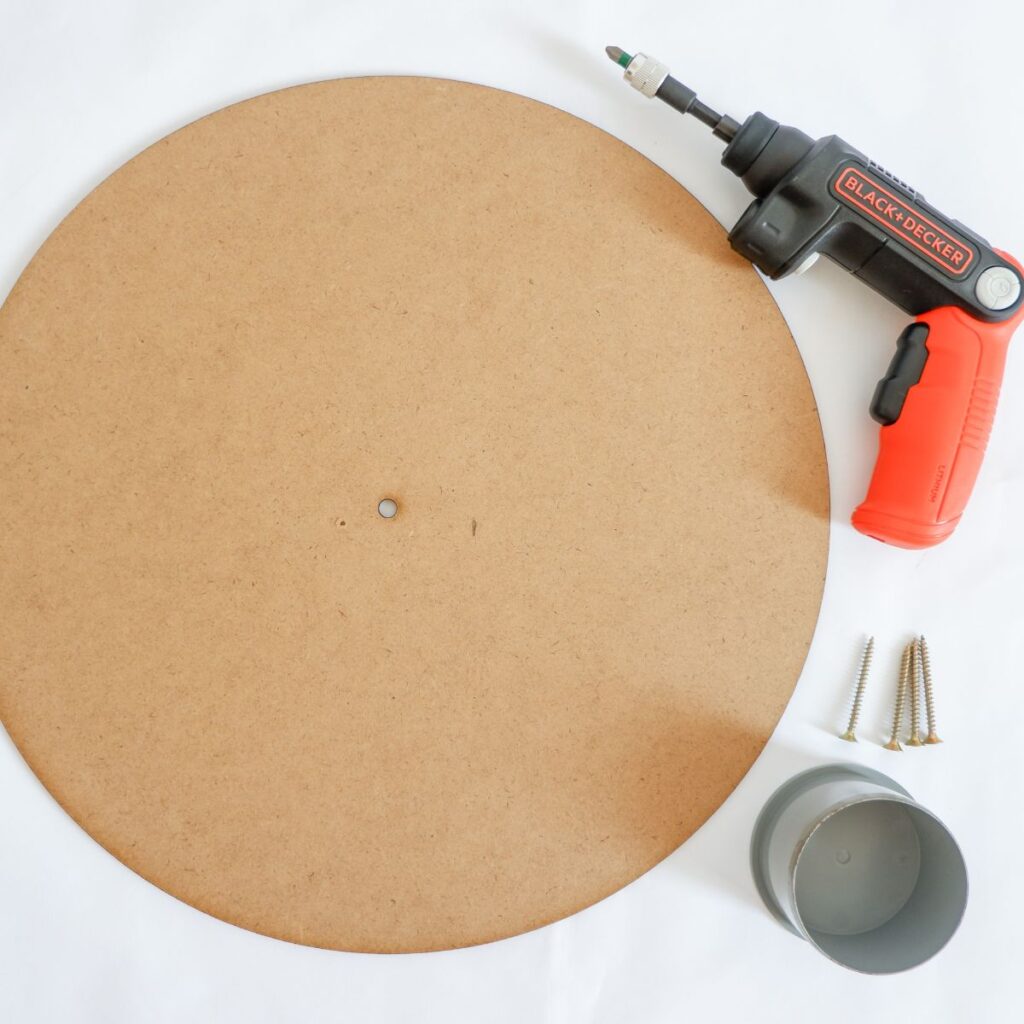
- Take a round wood board (the thicker the better), a drill, 4 wood screws and the lid of the plumbing pipe (which will be the body of the cactus).
STEP 2) Securing the Base
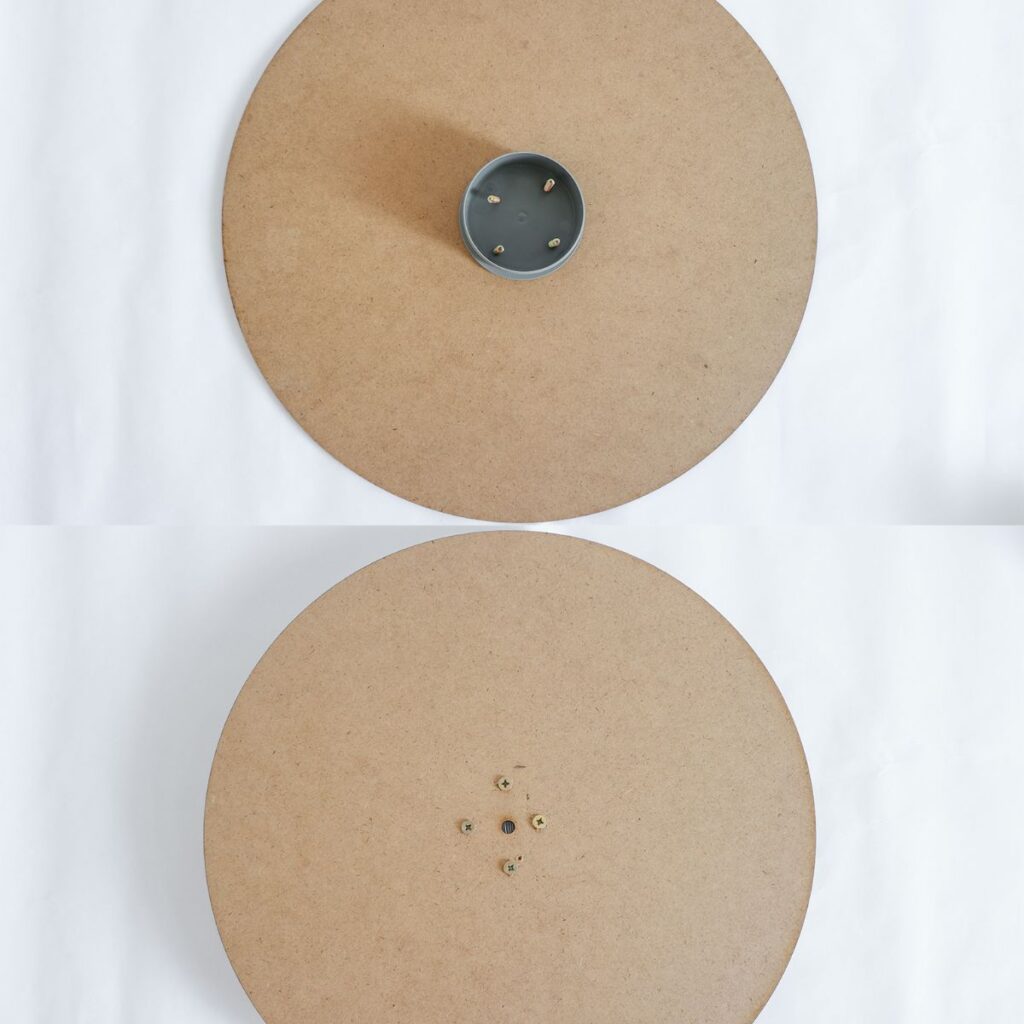
- Pre-drill holes in the lid, then center it on the board and mark the screw positions with a pencil.
- Attach the lid to the board using wood screws.
STEP 3) Creating the Body of the Cactus

- Insert a 1 meter long plumbing pipe on the lid and secure it with hot glue.
STEP 4) Weighing the Pipe Down
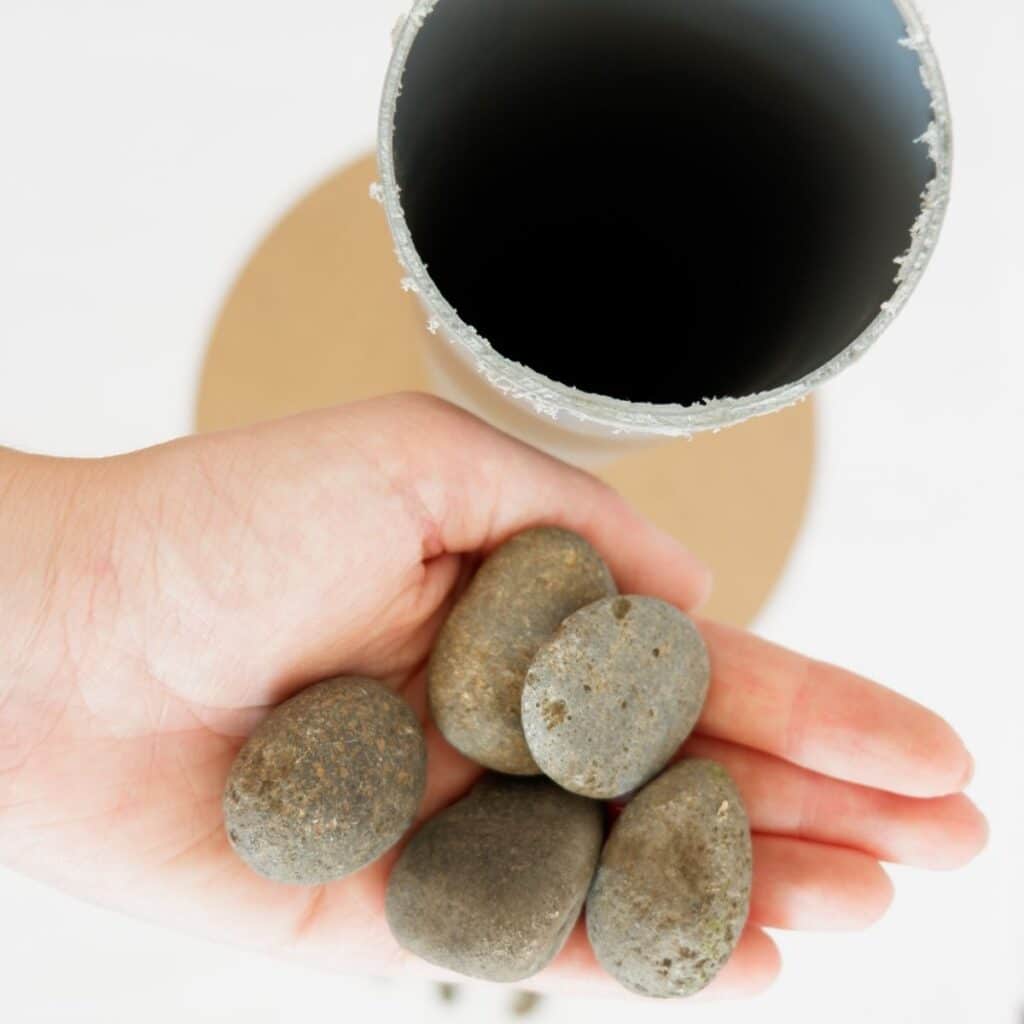
- Fill ⅓ of the pipe with stones, concrete or cement to keep it stable.
STEP 5) Creating the Arms of the Cactus
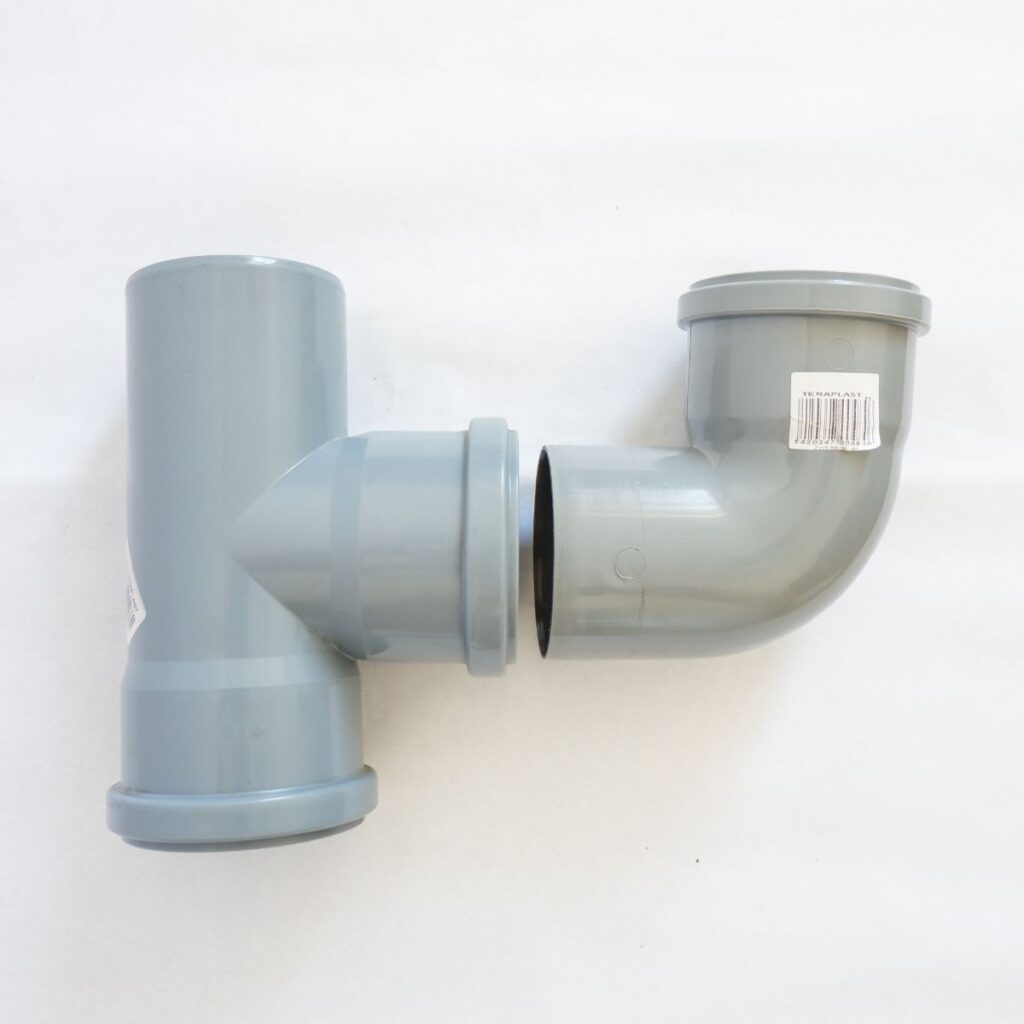
- Connect one of the single tees (pipe connector) with one of the 90° elbow pipes.
STEP 6) Attaching the Arms
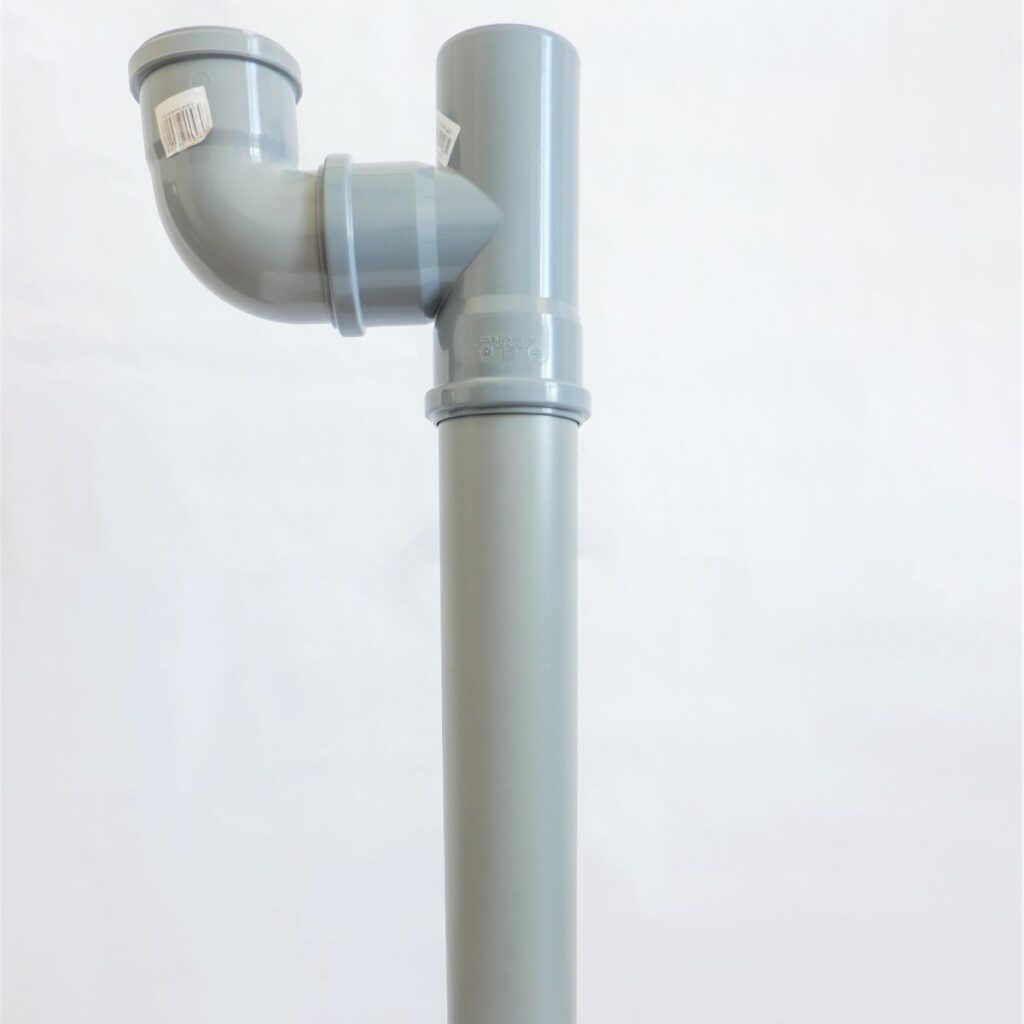
- Connect the structure you put together in step 5 to the pipe. Repeat step 5 and 6 to achieve the cactus look.
STEP 7) Adding the Tops
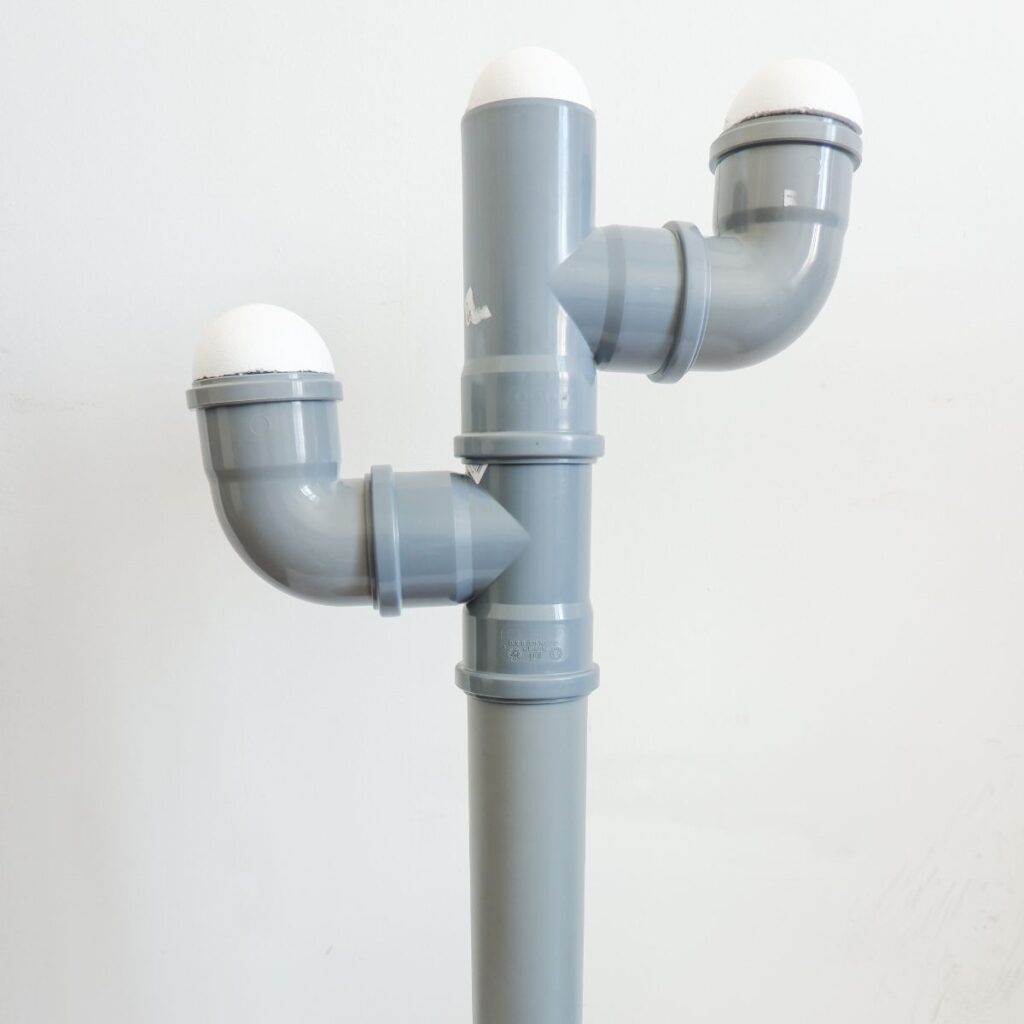
- Cut 2 polystyrene baubles in half and glue one half to each of the ends including the 2 arms and the top.
STEP 8) Painting the Cactus
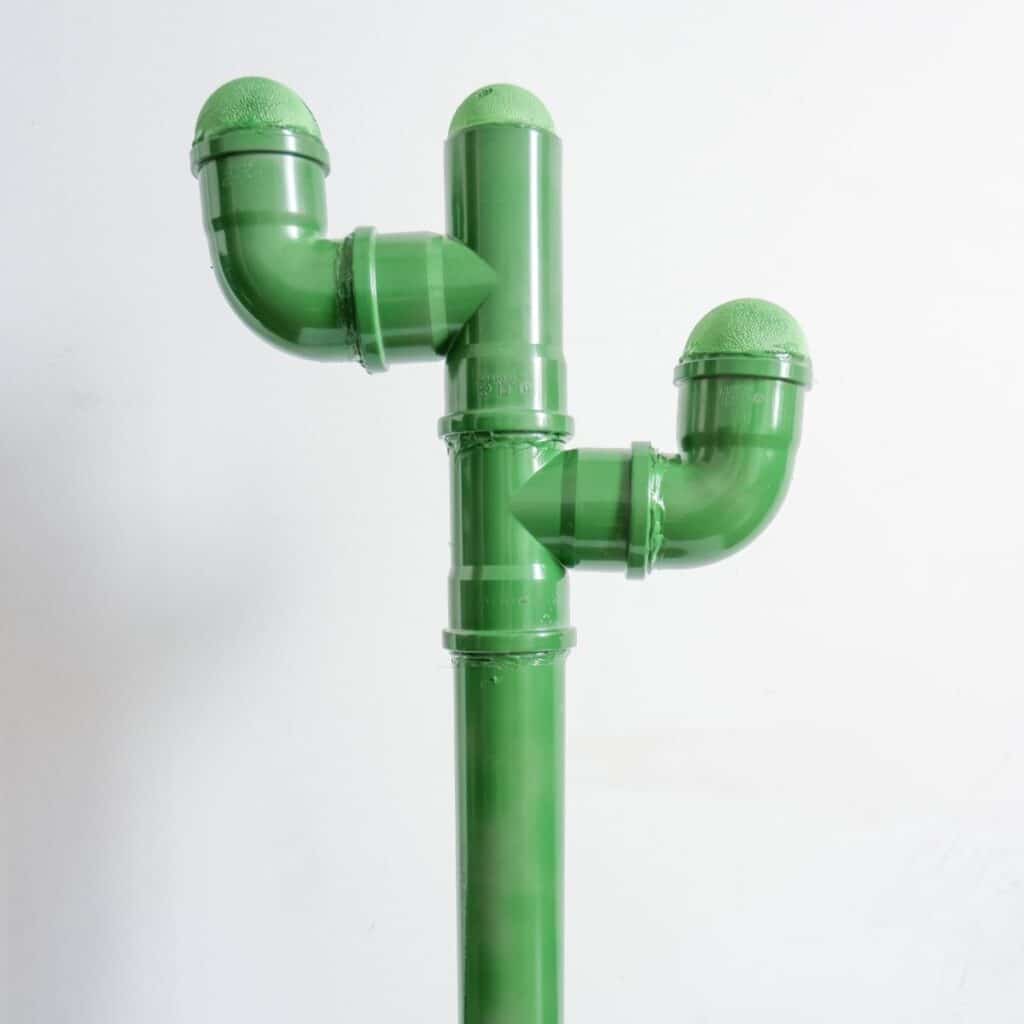
- Spray paint the cactus in green to prevent the grey color showing through the rope.
STEP 9) Dying the Rope
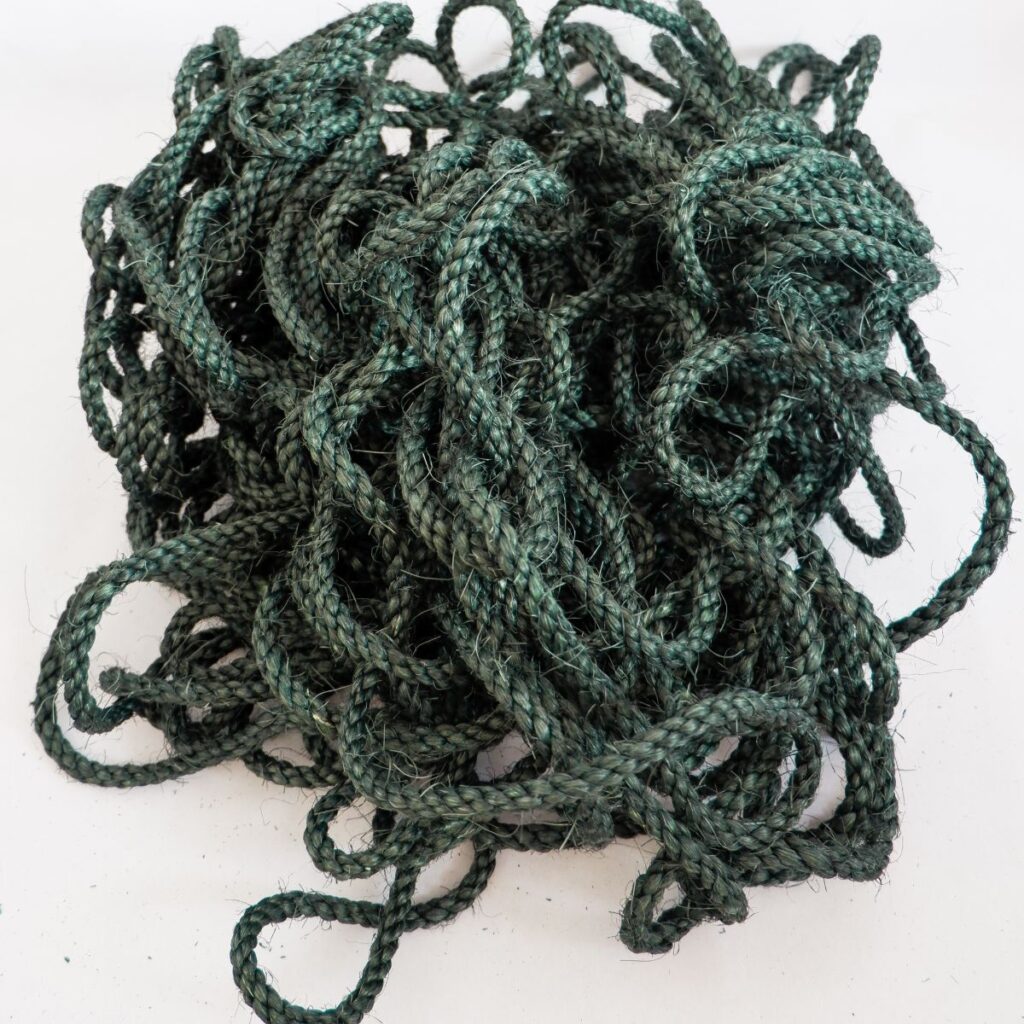
- Dye the majority of your sisal rope green with pet safe textile dye (but leave some plain for the board). You can find instructions for this on the dye’s packaging.
STEP 10) Gluing the Rope
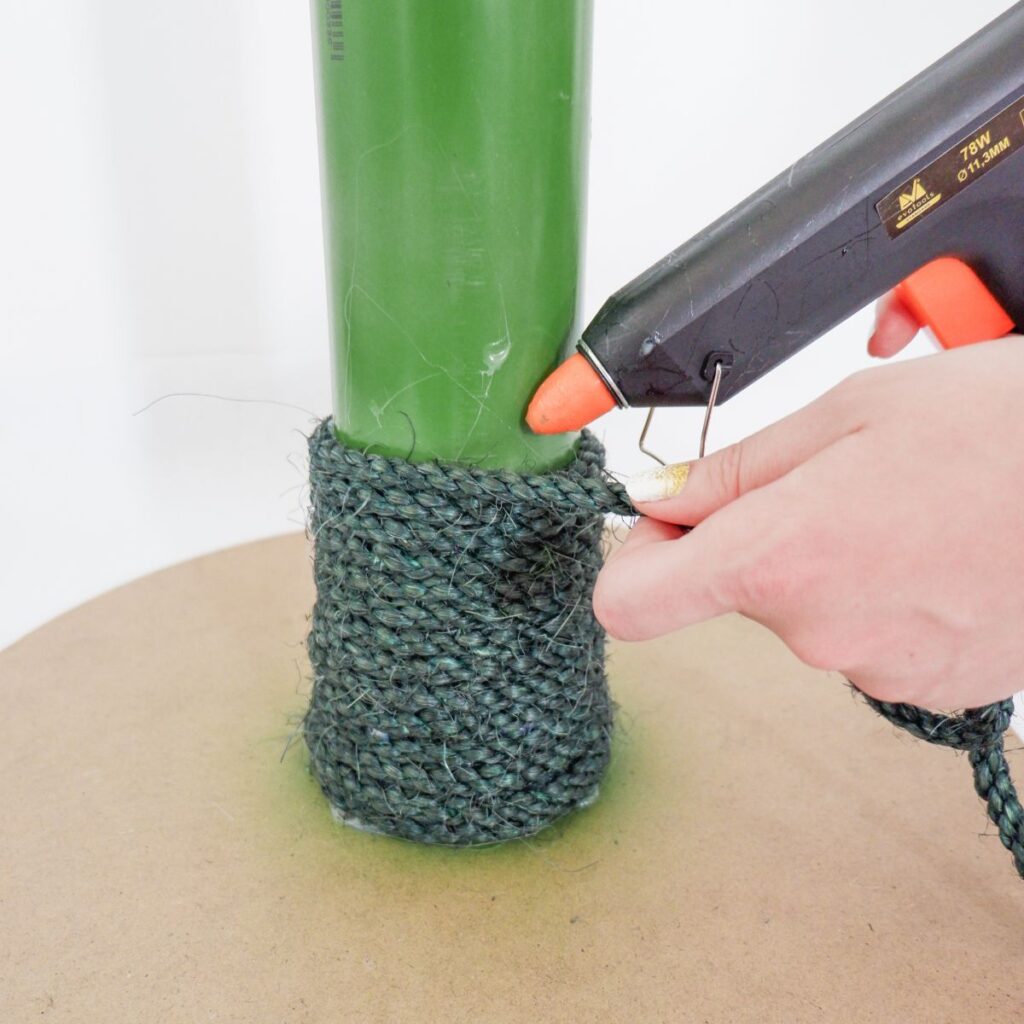
- Start glue gunning the rope to the pipe from the base to the first junction.
STEP 11) Continuing at the Junctions
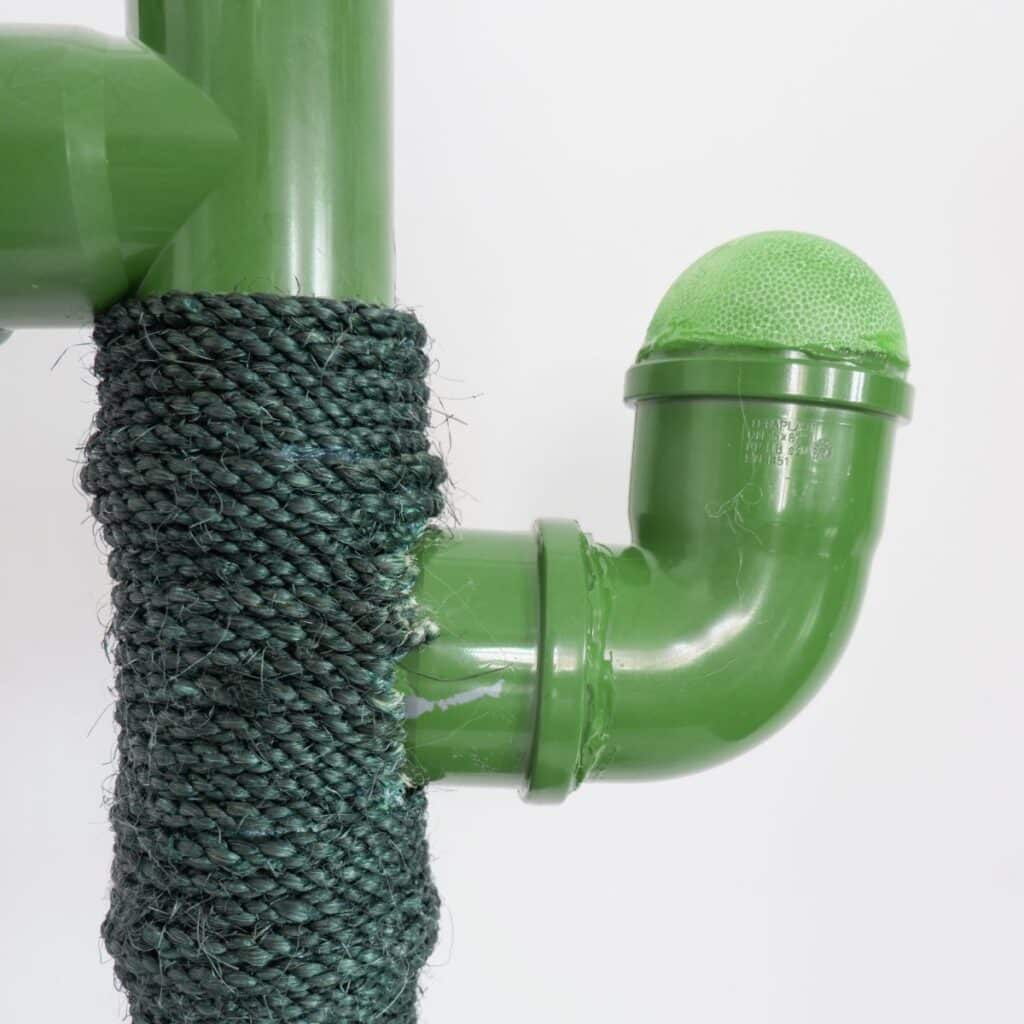
- At the junctions, use smaller pieces of rope and glue them on. Make them a little bit longer so you can cover the ends with glue in the next step.
STEP 12) Covering the Arms
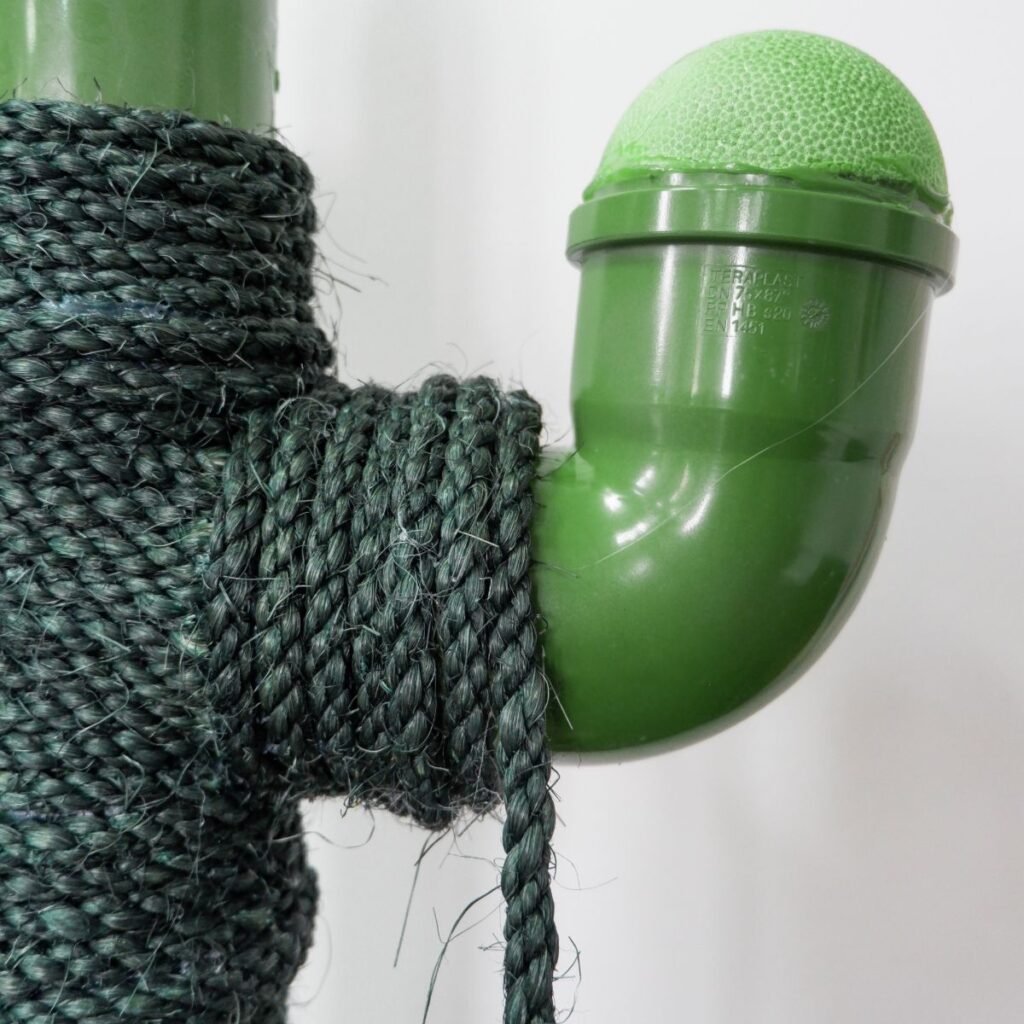
- Continue wrapping the rope around the elbow, covering the ends from the previous step to prevent them from unraveling. Repeat this at the next junction, finishing the top by wrapping the rope around.
STEP 13) Covering the Base
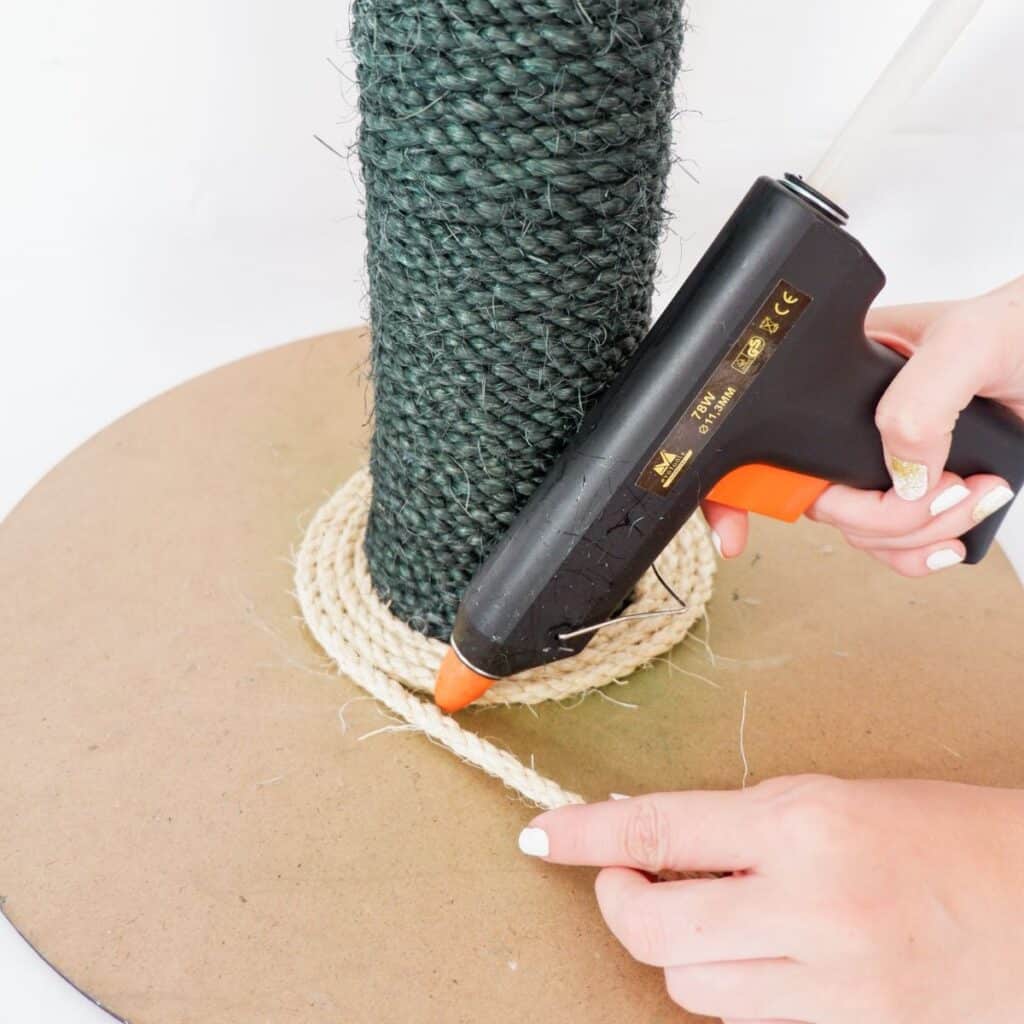
- Cover the wood board with natural sisal rope by glue gunning it.
STEP 14) Adding Artificial Flowers
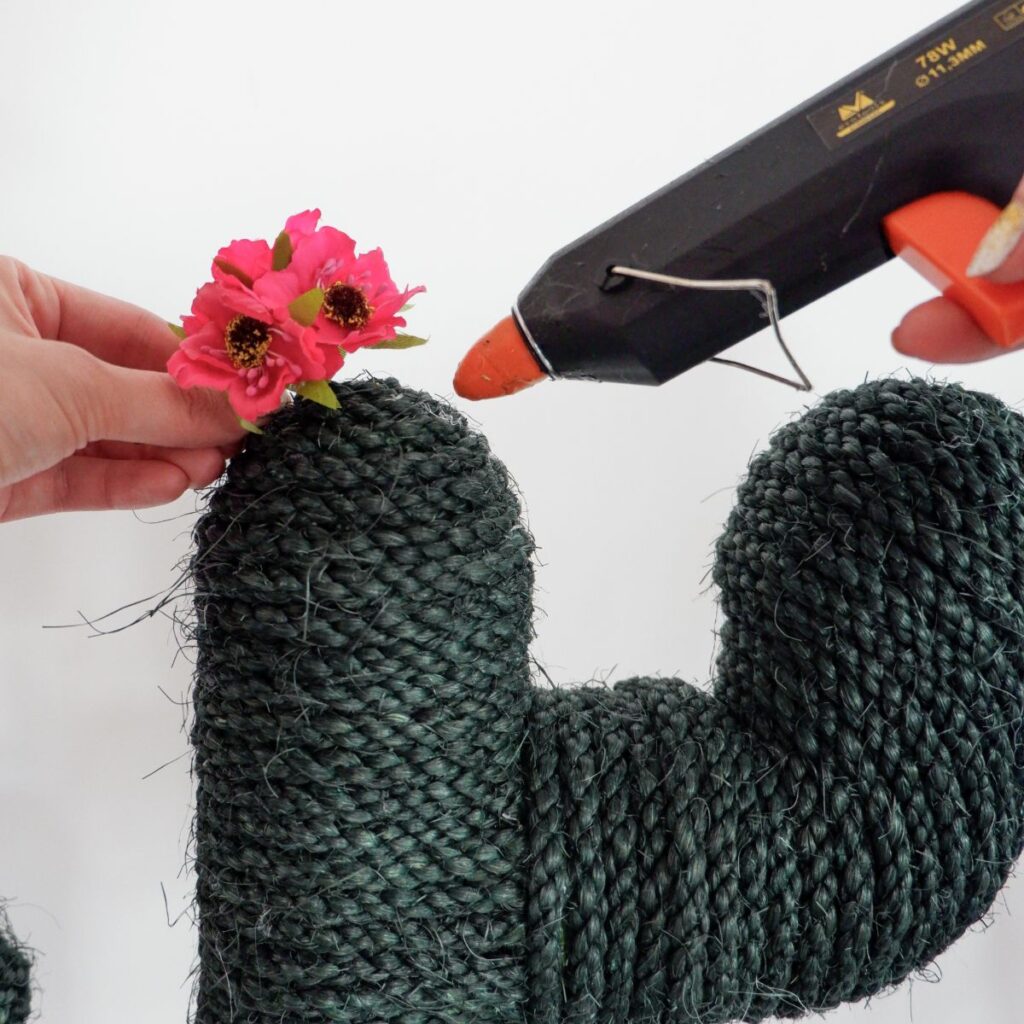
- For a nice finishing touch, add some fake flowers to the tops of the cactus.
STEP 15) DIY Cactus Cat Scratcher Ready!
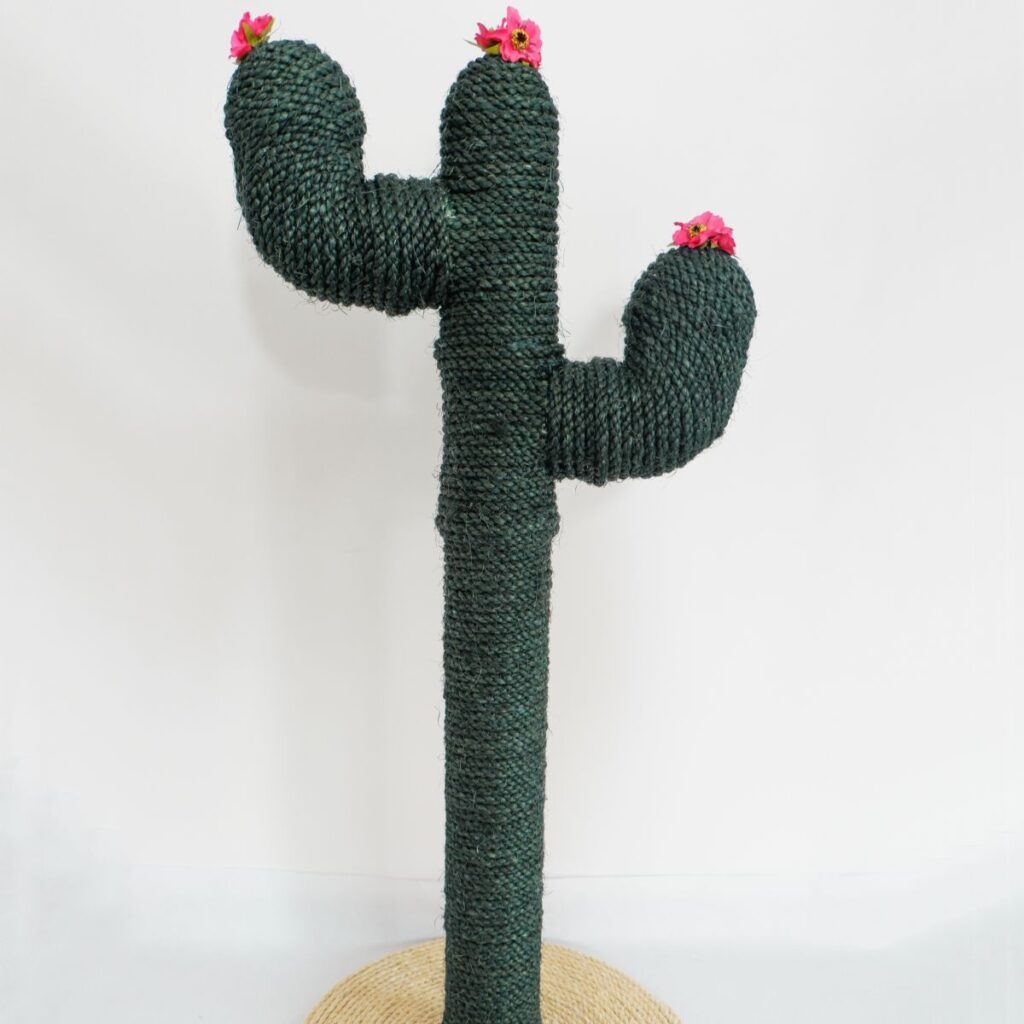
- You’re done! Spoil your fur baby on International Cat Day (and not just) with this special scratcher and some extra treats!
Tips and Tricks
- Ensure your work area is well-ventilated, especially when working with glue and spray paint.
- Apply multiple thin coats of paint for even coverage. Allow each coat to dry thoroughly before applying the next.
- Add catnip to the finished scratcher to make it more enticing for your kitty pal.
- Ensure all materials, especially the dye, are pet-safe and non-toxic.
- Place the scratcher in an area where your kitty already enjoys spending time.
Organisations To Support
International Cat Day is a purr-fect time for everyone to show extra affection to their fur babies and to remember the ones in need. Many organisations depend on public donations to rescue strays, provide medical attention, and find them forever homes. Supporting these groups can greatly improve the lives of countless strays, ensuring they get the love they deserve. Here are some organisations you can support.
- Cats Protection is the UK’s largest welfare charity, dedicated to the care and rehoming of felines since 1927. They provide adoption services, neutering assistance, and educational resources to promote feline well-being.
- London Inner City Kitties is a non-profit, no-kill charity in East London dedicated to rescuing and rehoming felines in need, particularly those requiring medical treatment or special care. Run entirely by volunteers, the organisation uses 100% of donations for medical expenses and supplies, supporting over 350 rescues annually.
- New Start Cat Rescue is a UK-based charity dedicated to rescuing and rehoming abandoned and unwanted felines. They provide essential veterinary care, foster homes, and support until these animals find their forever homes.
- Catcuddles is a London-based charity focused on rescuing, rehabilitating, and rehoming felines in need. They offer a variety of services, including veterinary care, fostering, and adoption support, ensuring each animal receives the love and care they deserve.
- Alley Cat Allies is a global organisation dedicated to the protection and humane treatment of cats. They focus on advocacy, education, and hands-on programs such as Trap-Neuter-Return (TNR) to improve the lives of feral and strays.
- Yorkshire Cat Rescue is a charity based in West Yorkshire, UK, committed to rescuing and rehoming stray and abandoned animals. They provide vital veterinary care, foster homes, and adoption services to ensure each one finds a loving, permanent home.
- Lothian Cat Rescue is a Scottish charity dedicated to rescuing and rehoming stray, abandoned, and unwanted felines. They provide essential care, including veterinary treatment and foster housing, to ensure the well-being of these animals until they are adopted.
- Feline Friends London is a volunteer-run charity focused on rescuing and rehoming kittens and adult felines across London. They provide essential services such as fostering, veterinary care, and adoption support to ensure the well-being of these animals.
- Stray Cat Alliance is a nonprofit organisation based in Los Angeles, dedicated to the care and protection of stray and feral felines. They provide services such as Trap-Neuter-Return (TNR), medical attention, and adoption programs to improve the lives of community animals.
- Purrfect Pals is a Washington State-based nonprofit organisation dedicated to rescuing and rehoming felines, particularly those with special needs. They offer veterinary services and behavioral support to ensure the well-being of these animals.
- The Cat House on the Kings is California’s largest no-cage, no-kill, lifetime sanctuary and adoption center for felines. They rescue hundreds of these animals, providing a safe and loving environment while seeking permanent homes for those eligible for adoption.
- The Cat Network is a nonprofit organisation in South Florida dedicated to humanely reducing the overpopulation of stray and feral felines. They offer programs such as low-cost spay/neuter services, adoption, and Trap-Neuter-Return (TNR) to support their mission.
 Download Article